> ## Documentation Index
> Fetch the complete documentation index at: https://arizeai-433a7140-claude-graphql-project-auth-check-eta8st.mintlify.site/llms.txt
> Use this file to discover all available pages before exploring further.
# Annotating in the UI
> How to annotate traces in the UI for analysis and dataset curation
## Configuring Annotations
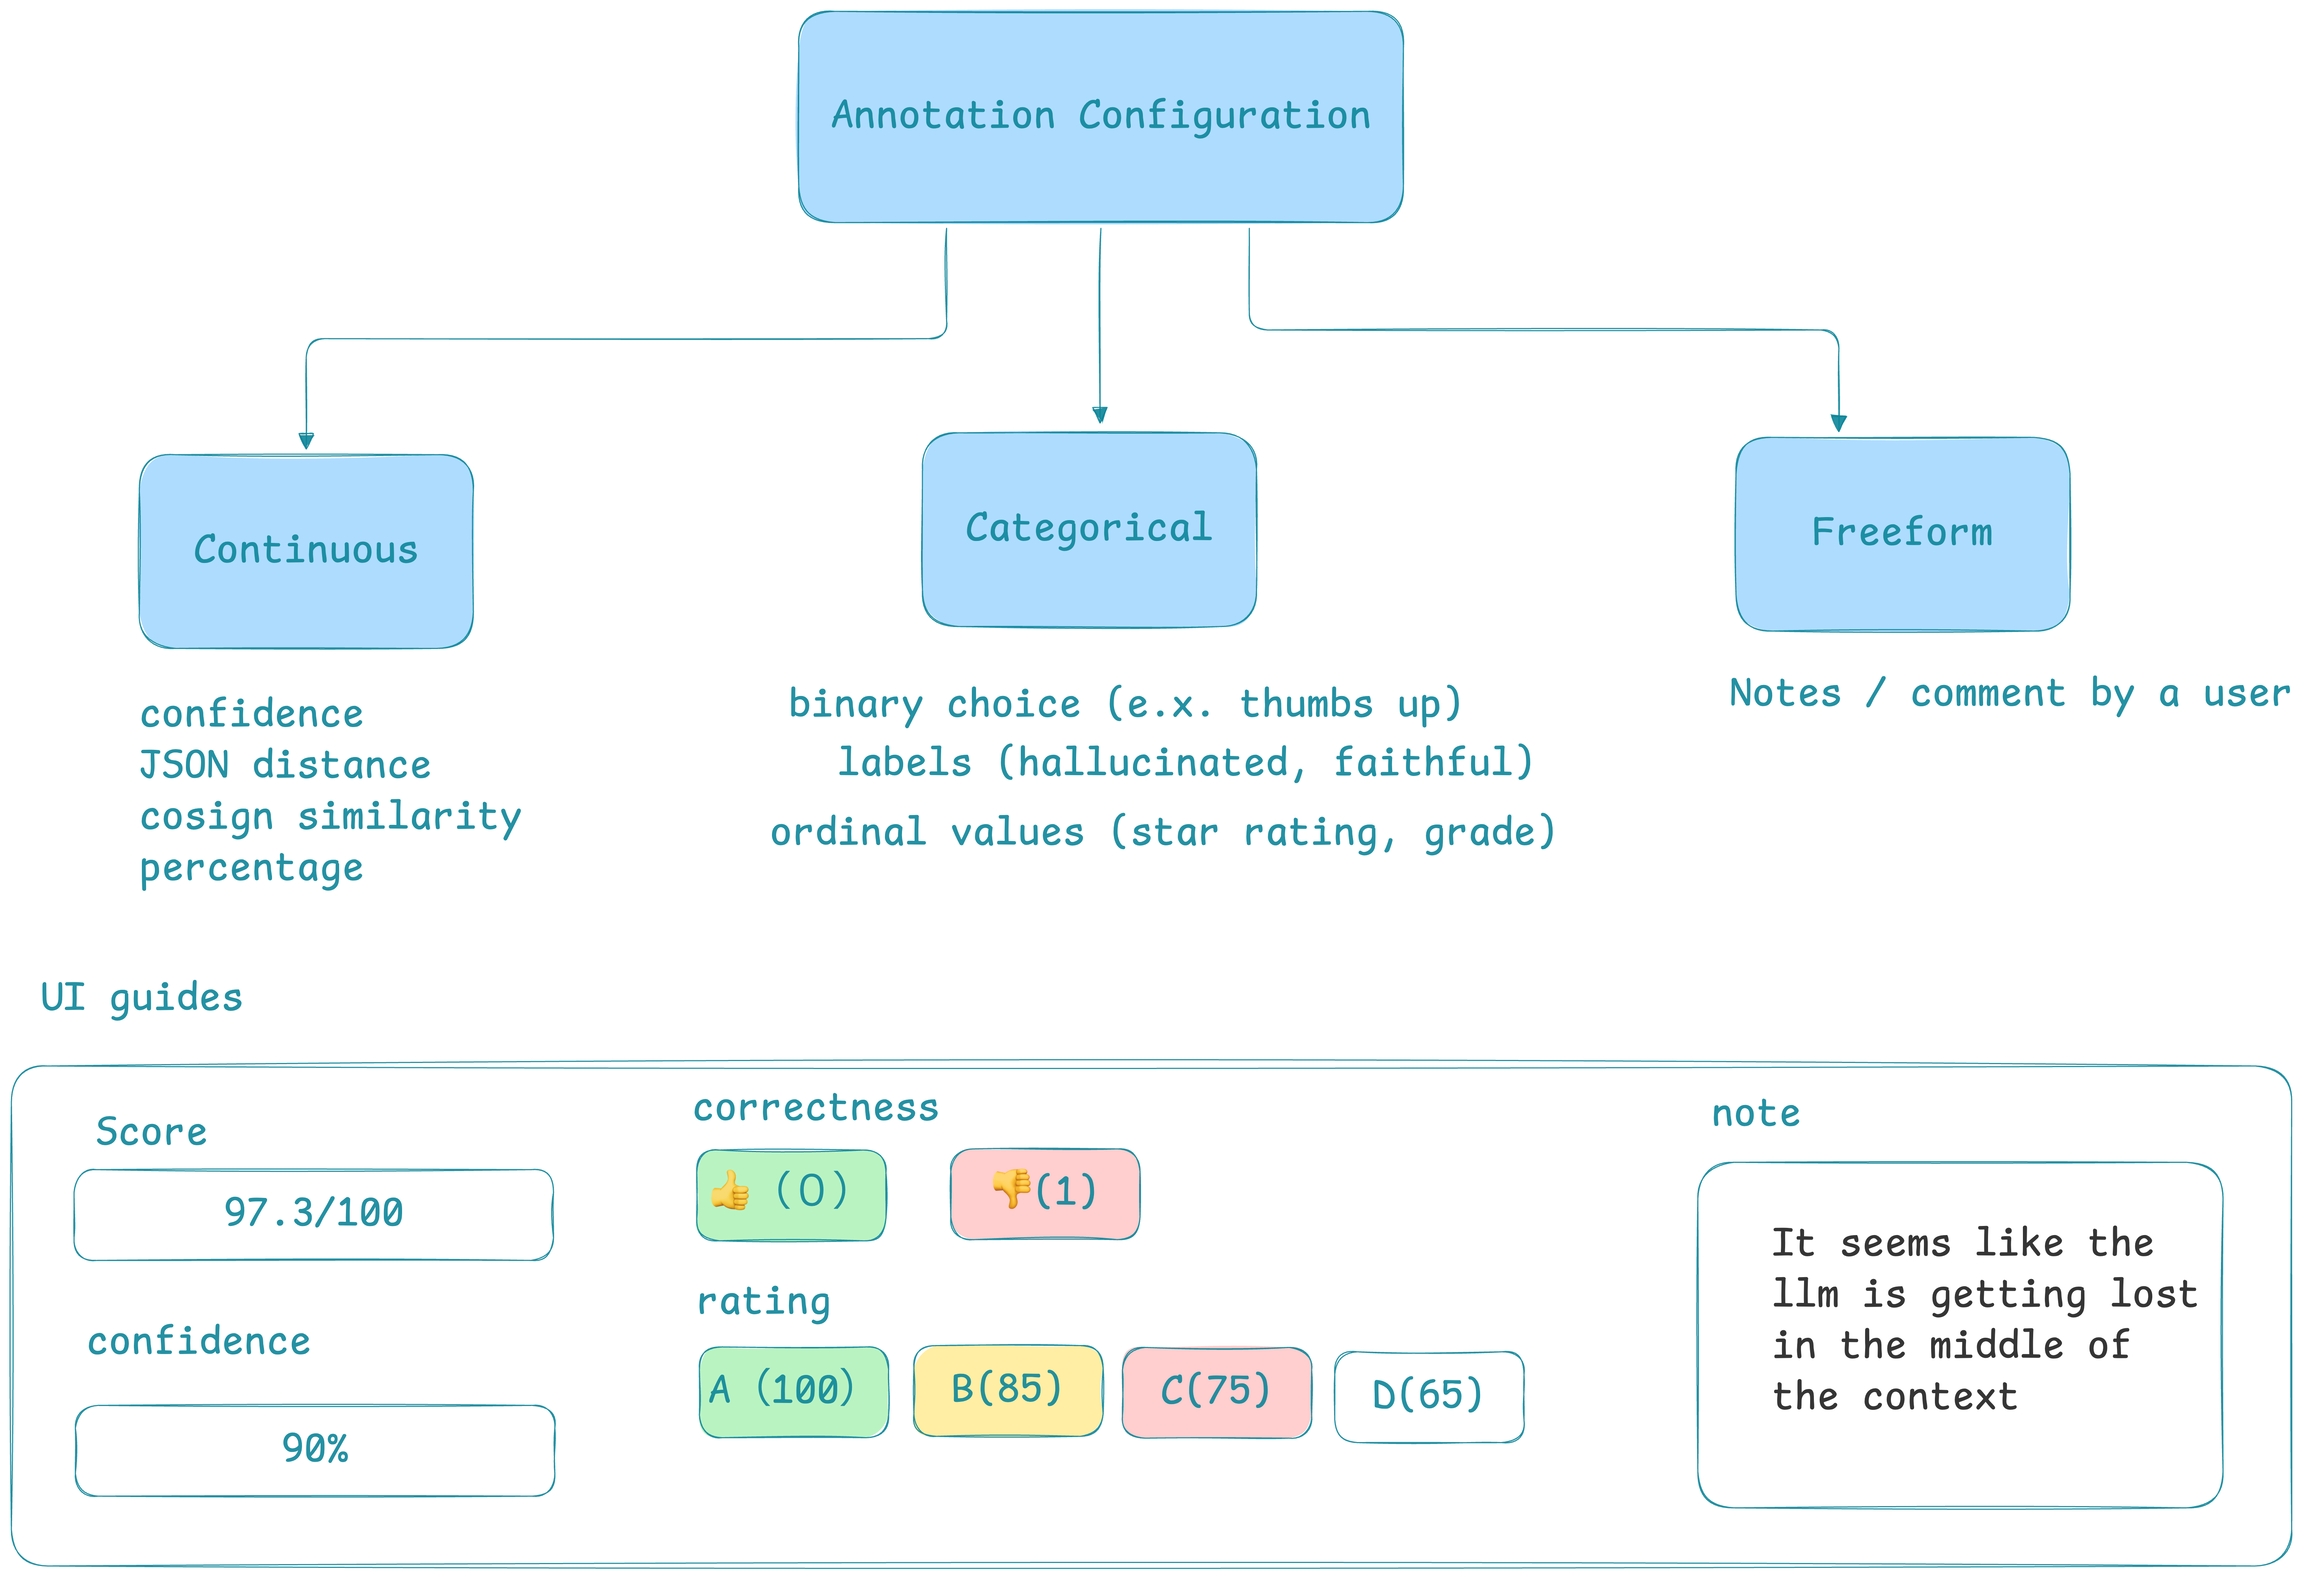
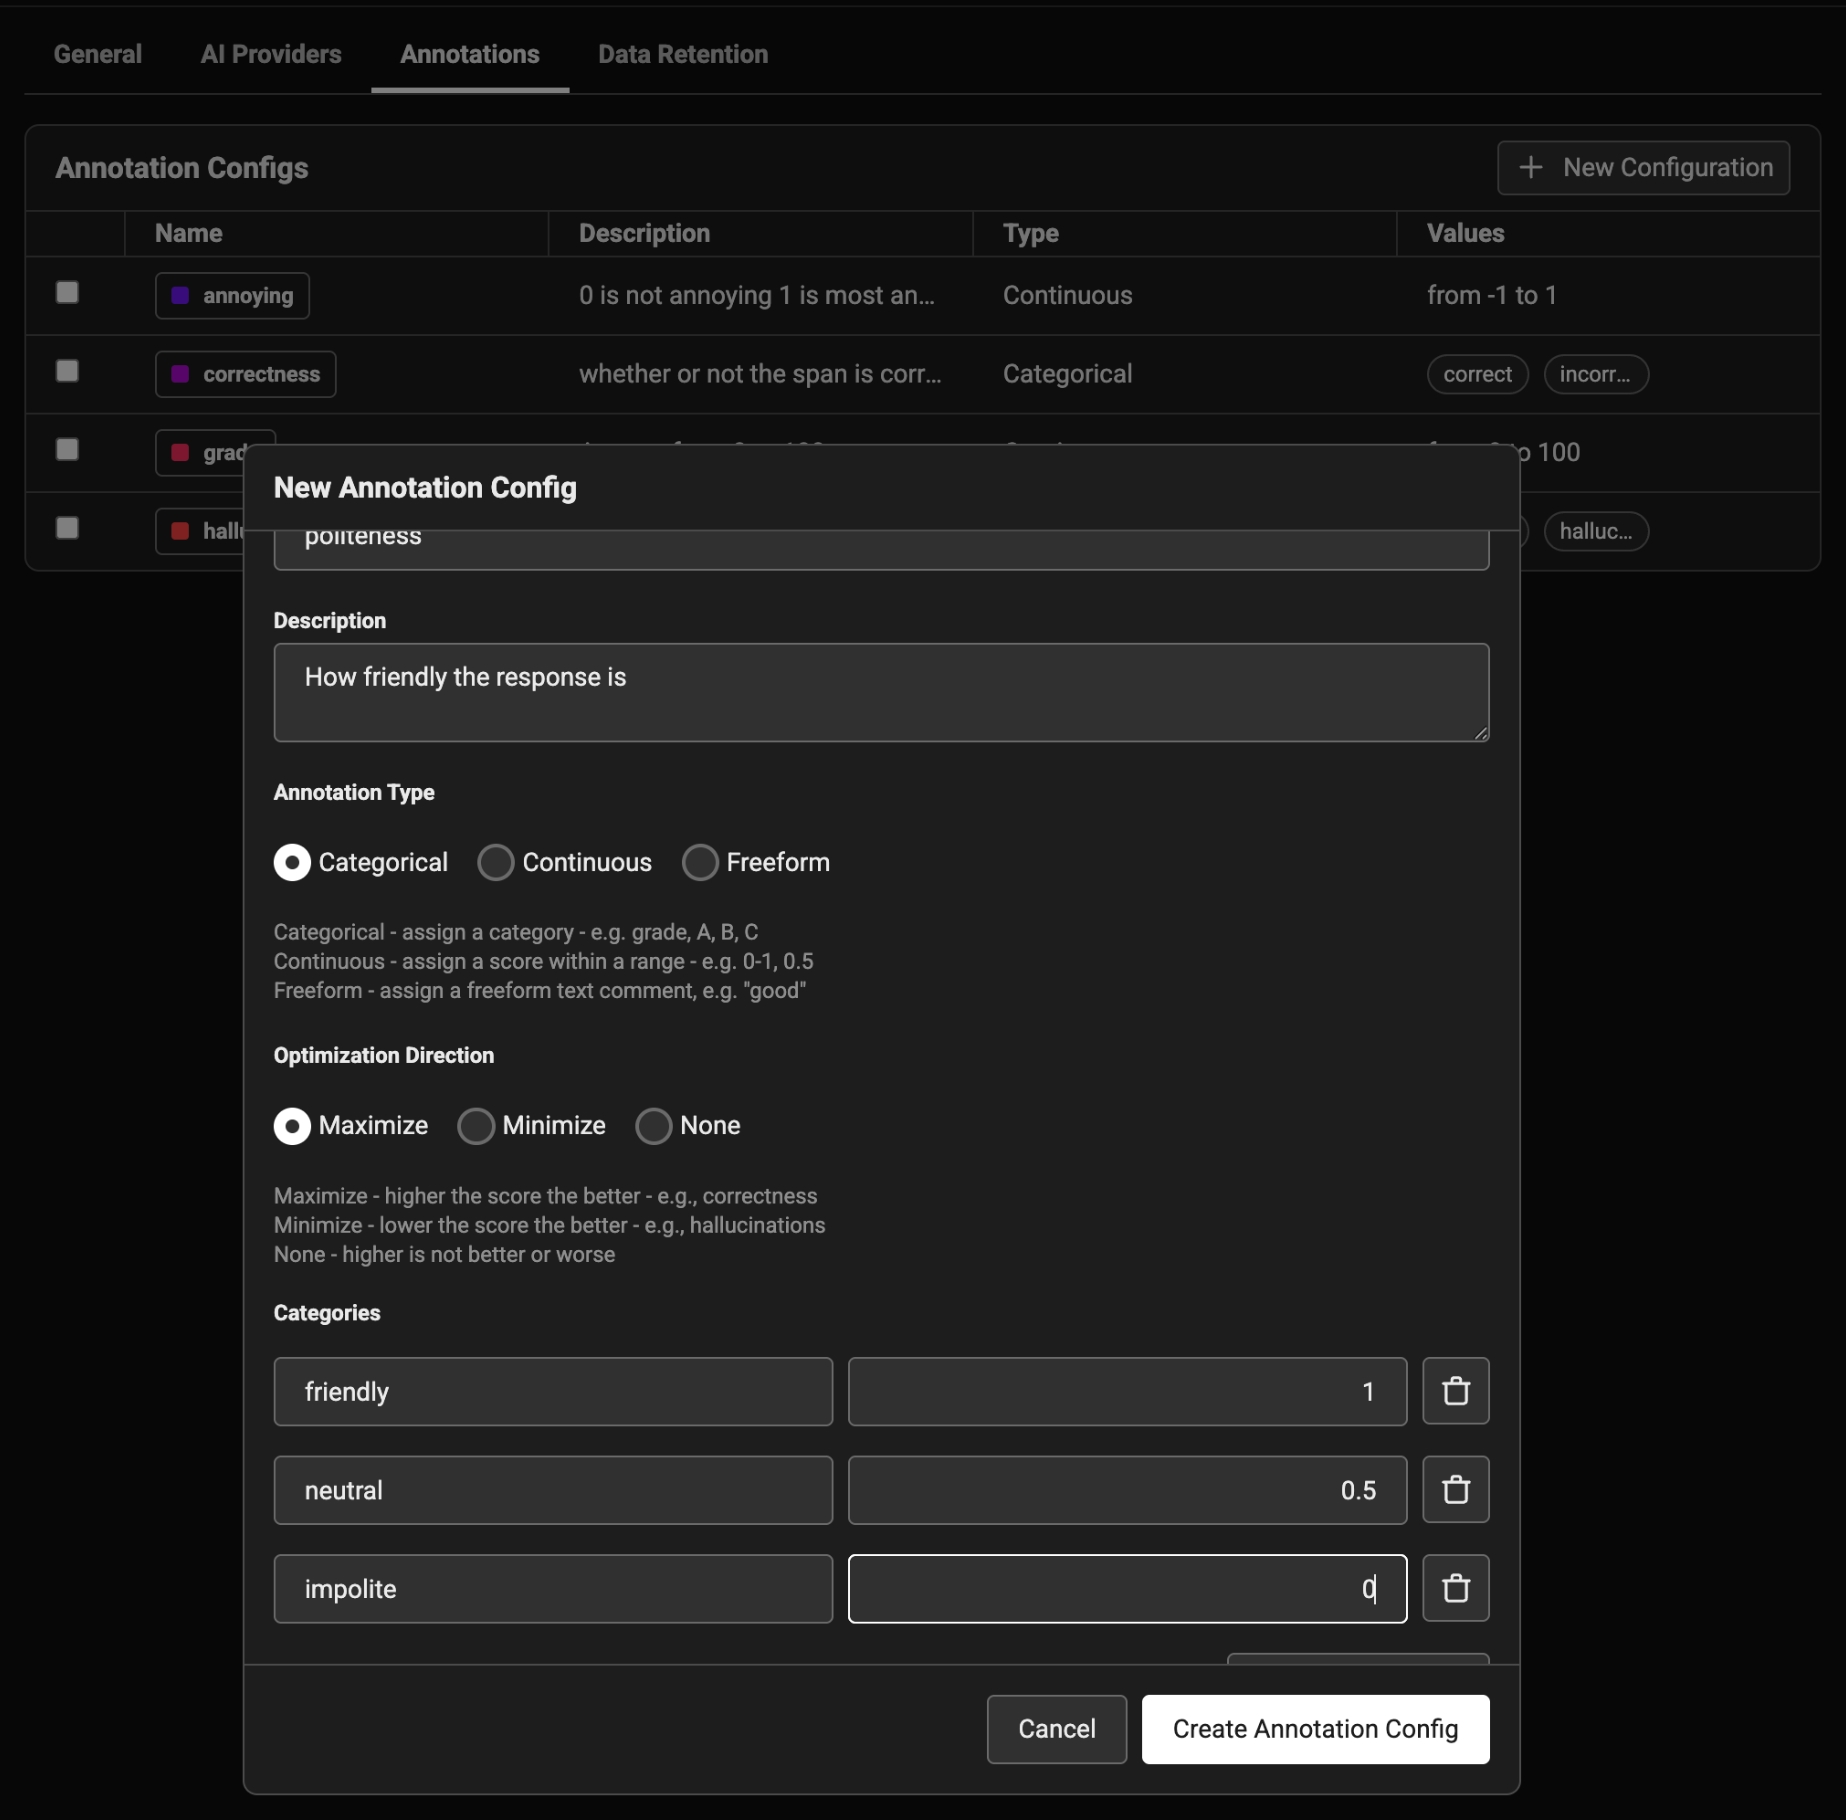
To annotate data in the UI, you first will want to setup a rubric for how to annotate. Navigate to `Settings` and create annotation configs (e.g. a rubric) for your data. You can create various different types of annotations: **Categorical**, **Continuous**, and **Freeform**.
* Annotation Type:
- **Categorical:** Predefined labels for selection. (e.x. 👍 or 👎)
- **Continuous:** a score across a specified range. (e.g. confidence score 0-100)
- **Freeform:** Open-ended text comments. (e.g. "correct")
- Optimize the direction based on your goal:
- **Maximize:** higher scores are better. (e.g. confidence, faithfulness)
- **Minimize:** lower scores are better. (e.g. toxicity)
- **None:** direction optimization does not apply. (e.g. refusal)
 ## Adding Annotations
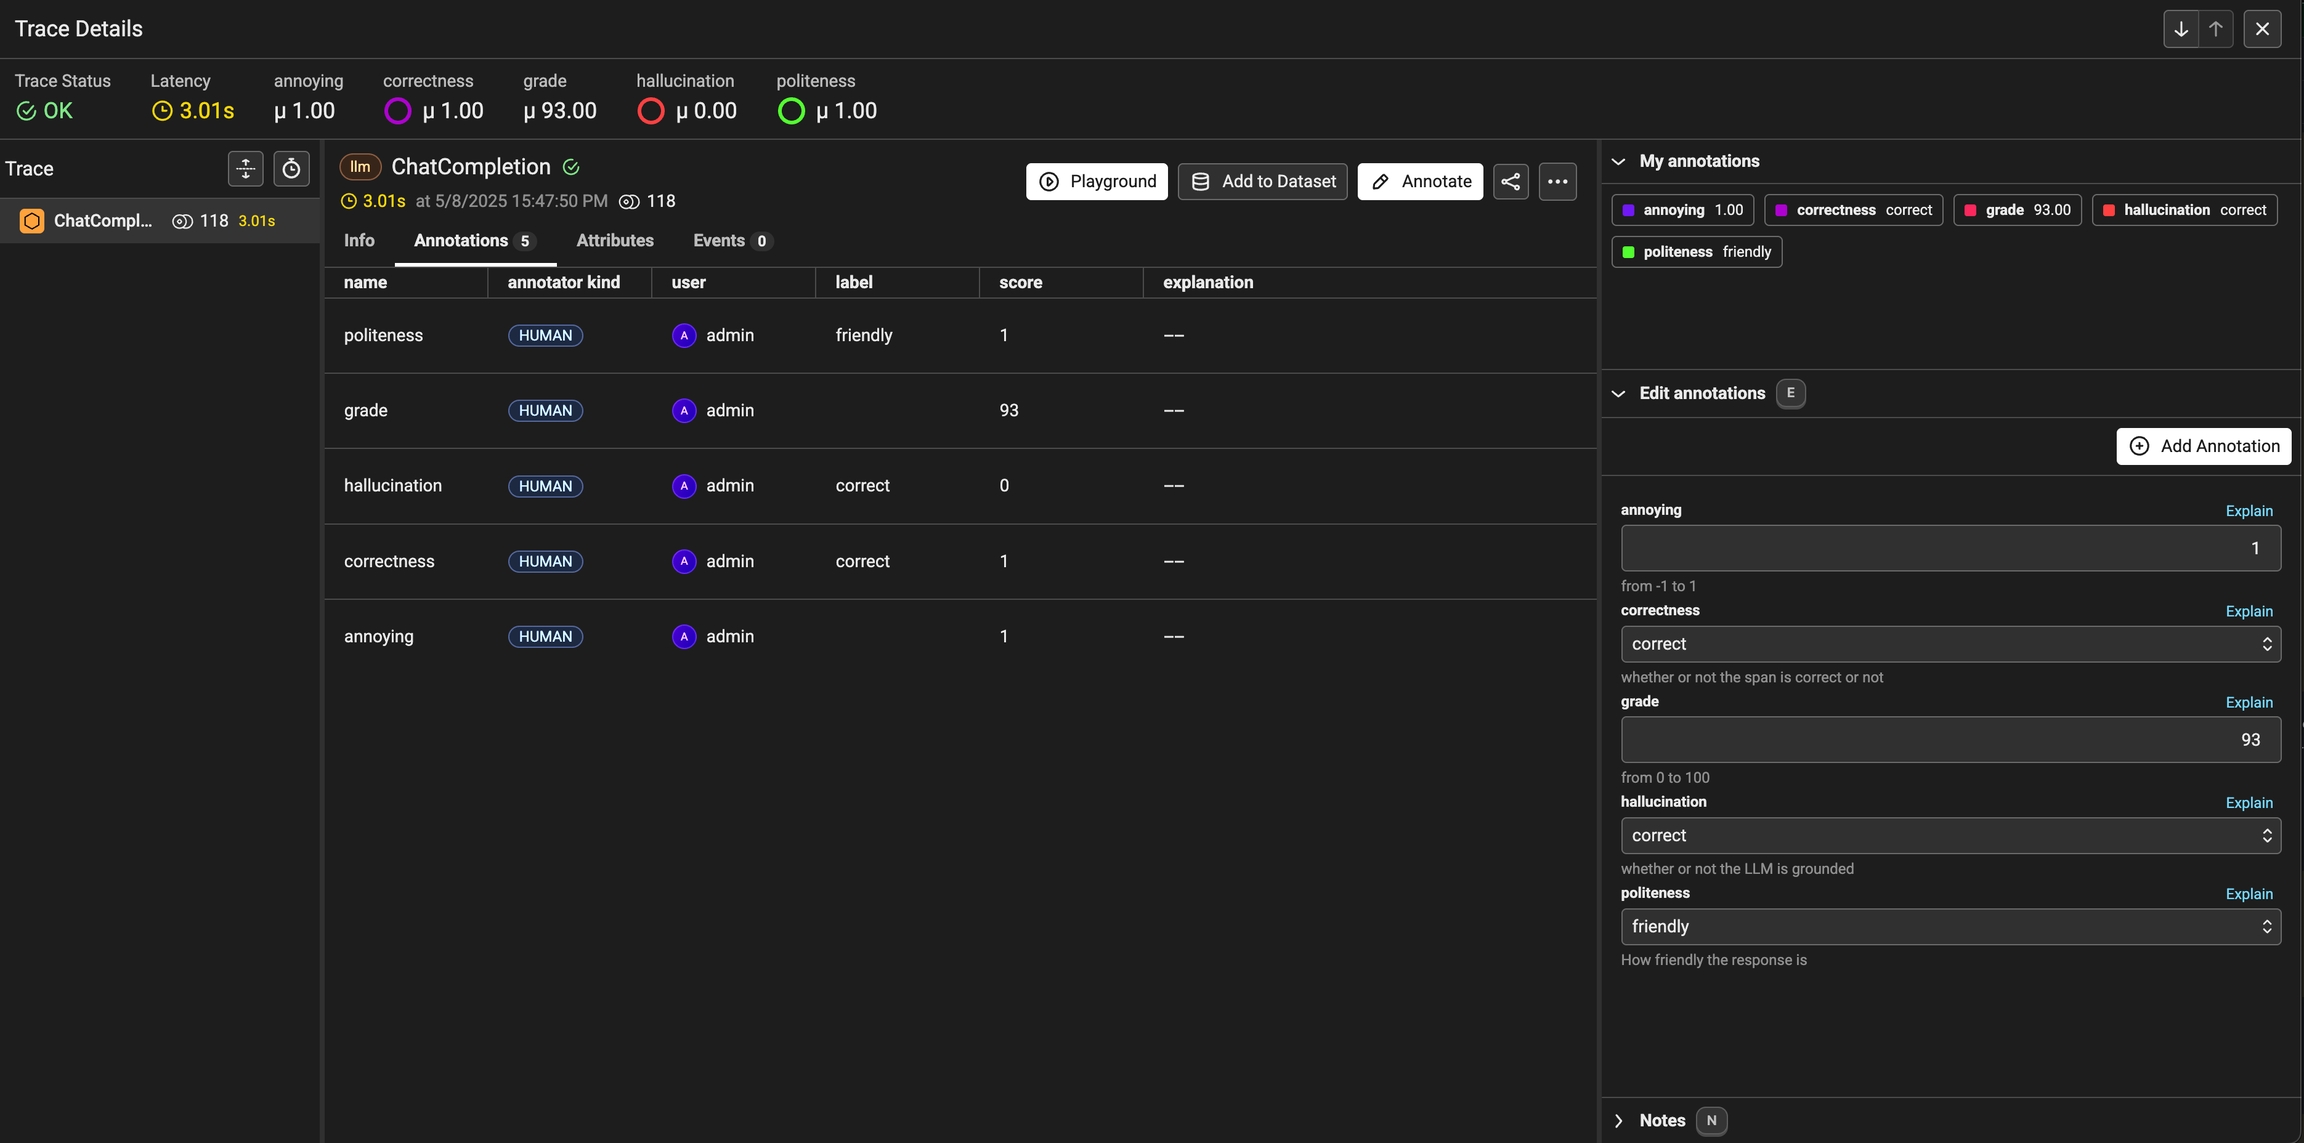
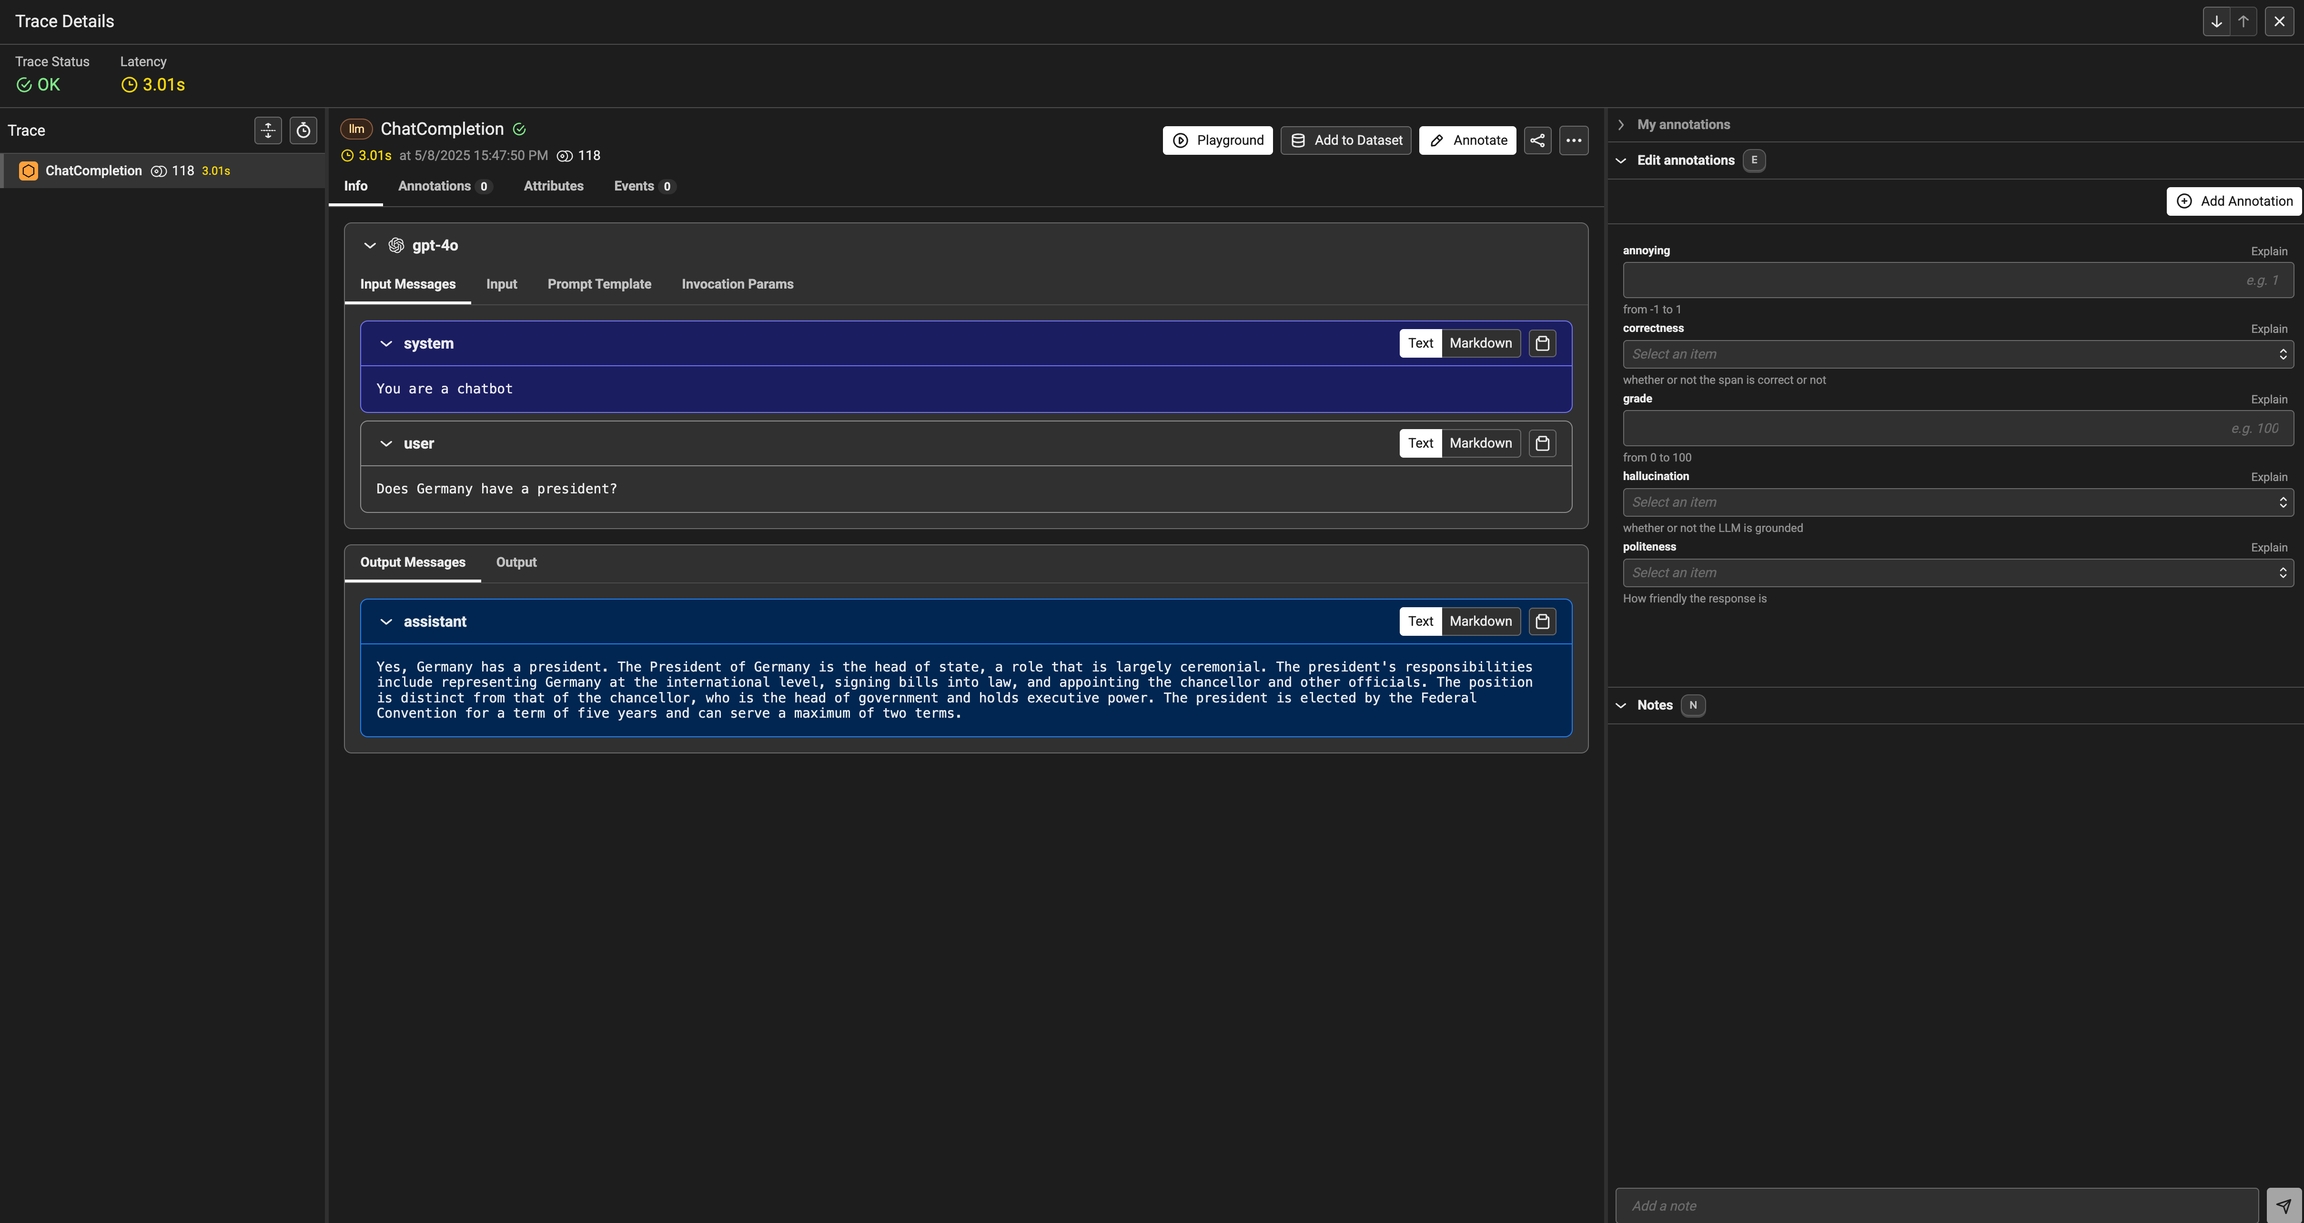 Once you have annotations configured, you can associate annotations to the data that you have traced. Click on the `Annotate` button and fill out the form to rate different steps in your AI application.
You can also take notes as you go by either clicking on the `explain` link or by adding your notes to the bottom messages UI.
You can always come back and edit / and delete your annotations. Individual annotations can be deleted from the table view under the `Annotations` tab. To remove every annotation with a given name across an entire project at once, an admin can use the bulk delete in [Project Settings](/docs/phoenix/tracing/llm-traces/projects#annotation-summary-and-bulk-delete).
Once an annotation has been provided, you can also add a reason to explain why this particular label or score was provided. This is useful to add additional context to the annotation.
## Viewing Annotations
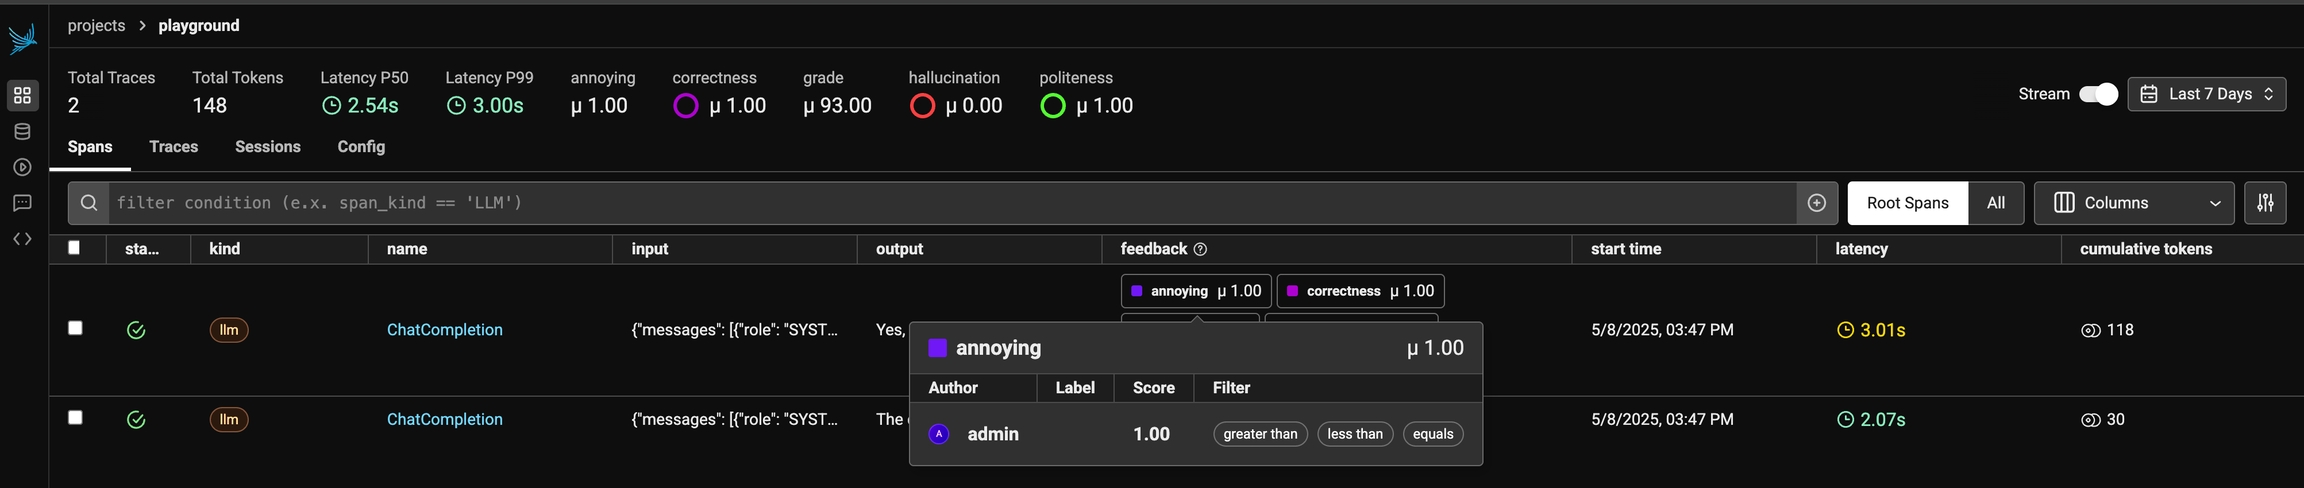
As annotations come in from various sources (annotators, evals), the entire list of annotations can be found under the `Annotations` tab. Here you can see the author, the annotator kind (e.g. was the annotation performed by a human, llm, or code), and so on. This can be particularly useful if you want to see if different annotators disagree.
Once you have annotations configured, you can associate annotations to the data that you have traced. Click on the `Annotate` button and fill out the form to rate different steps in your AI application.
You can also take notes as you go by either clicking on the `explain` link or by adding your notes to the bottom messages UI.
You can always come back and edit / and delete your annotations. Individual annotations can be deleted from the table view under the `Annotations` tab. To remove every annotation with a given name across an entire project at once, an admin can use the bulk delete in [Project Settings](/docs/phoenix/tracing/llm-traces/projects#annotation-summary-and-bulk-delete).
Once an annotation has been provided, you can also add a reason to explain why this particular label or score was provided. This is useful to add additional context to the annotation.
## Viewing Annotations
As annotations come in from various sources (annotators, evals), the entire list of annotations can be found under the `Annotations` tab. Here you can see the author, the annotator kind (e.g. was the annotation performed by a human, llm, or code), and so on. This can be particularly useful if you want to see if different annotators disagree.
 ## Exporting Traces with specific Annotation Values
Once you have collected feedback in the form of annotations, you can filter your traces by the annotation values to narrow down to interesting samples (e.x. llm spans that are incorrect). Once filtered down to a sample of spans, you can export your selection to a dataset, which in turn can be used for things like experimentation, fine-tuning, or building a human-aligned eval.
## Exporting Traces with specific Annotation Values
Once you have collected feedback in the form of annotations, you can filter your traces by the annotation values to narrow down to interesting samples (e.x. llm spans that are incorrect). Once filtered down to a sample of spans, you can export your selection to a dataset, which in turn can be used for things like experimentation, fine-tuning, or building a human-aligned eval.